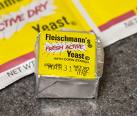
Ok. Last time I promised you a bread recipe. Oh oh!
The thing is, I don’t use any recipes for bread. I throw things in a bowl, mix it all up, let it rise, and bake it! But, I am a woman of honor and I keep my word. So here is my most basic bread recipe:
 One piece of advice: don’t bother with fast rising yeast. If you can get it, use fresh yeast, you know, the cake kind that crumbles…but any regular dried yeast will do. The problem with fast rising yeast is that the dough might get too dry, or the fast rising will make it smell like booze.
Like my Jung SuWon Grandmaster always, says, anything worthwhile in life, you have to work for and you have to be patient with. One of Dr. Tae Yun Kim’s favorite sayings is “a pregnant woman – no matter how morning sick – can’t have a baby after just 3 months. She has to wait for 9 months, until the baby is ready.”
You need to apply the same principle with bread. Back to the recipe. Here is my very basic recipe:
- 1 cake fresh yeast, or 1 envelope dried yeast
- 1 tablespoon honey
- 2 or so cups of lukewarm water (depending on how much bread you want to make)
- as much flour as it takes to make a plieable, smooth dough
Dissolve the honey in the water. Crumble in or sprinkle on the yeast, depending on what kind you are using. Wait a couple of minutes. Most cook books tell you that you must put this mixture in a draft free, warm place, and that is right. Just don’t fret if you don’t find such a place. Yeast dough is pretty indestructible, so relax and enjoy the process.
Once there are bubbles in the mixture, and you smell an intense yeast smell, add the flour and some salt. Keep adding flour as you are kneading the dough – when the dough hold together and forms a smooth, pliable ball, knead some more. Then cover it with saran wrap and let it rise. You could cover it with anything that prevents it from drying out, I prefer the saran since then I can watch the progress. The dough needs to rise until you have twice as much dough as when you started. (cook books will tell you “until double in bulk, but to me that sounds just too boring)
Now punch the dough down – and yes, you really want to punch it at this point. Knead it a little bit more – add a bit of flour if the dough is too soft, and then shape the dough into whatever you want – loaves, rolls, you can braid it….or put it in pans. Cover again with the saran wrap, and let rise again, about an hour or until almost doubled.
Of course you thought about pre-heating the oven, so now that it’s at about 350 degrees F, you put in your little miracles, and sit back and wait. Depending on how big the loaves are or the rolls, you’ll bake your creations from 10 minutes (small rolls) to an hour (loaves), but do test frequently.
From here on, it only gets more fun. The above was only a very basic homey recipe. You can use whole wheat flour, either all whole wheat, or partially, and you can mix in nuts, seeds, other flour, cooked oatmeal, and so forth. Instead of water, you can use milk, soy milk, water in which you have cooked potatoes, and…and….
If you are new at this, I would recommend sticking to the very basic at first, then go from there.


Recent Comments